
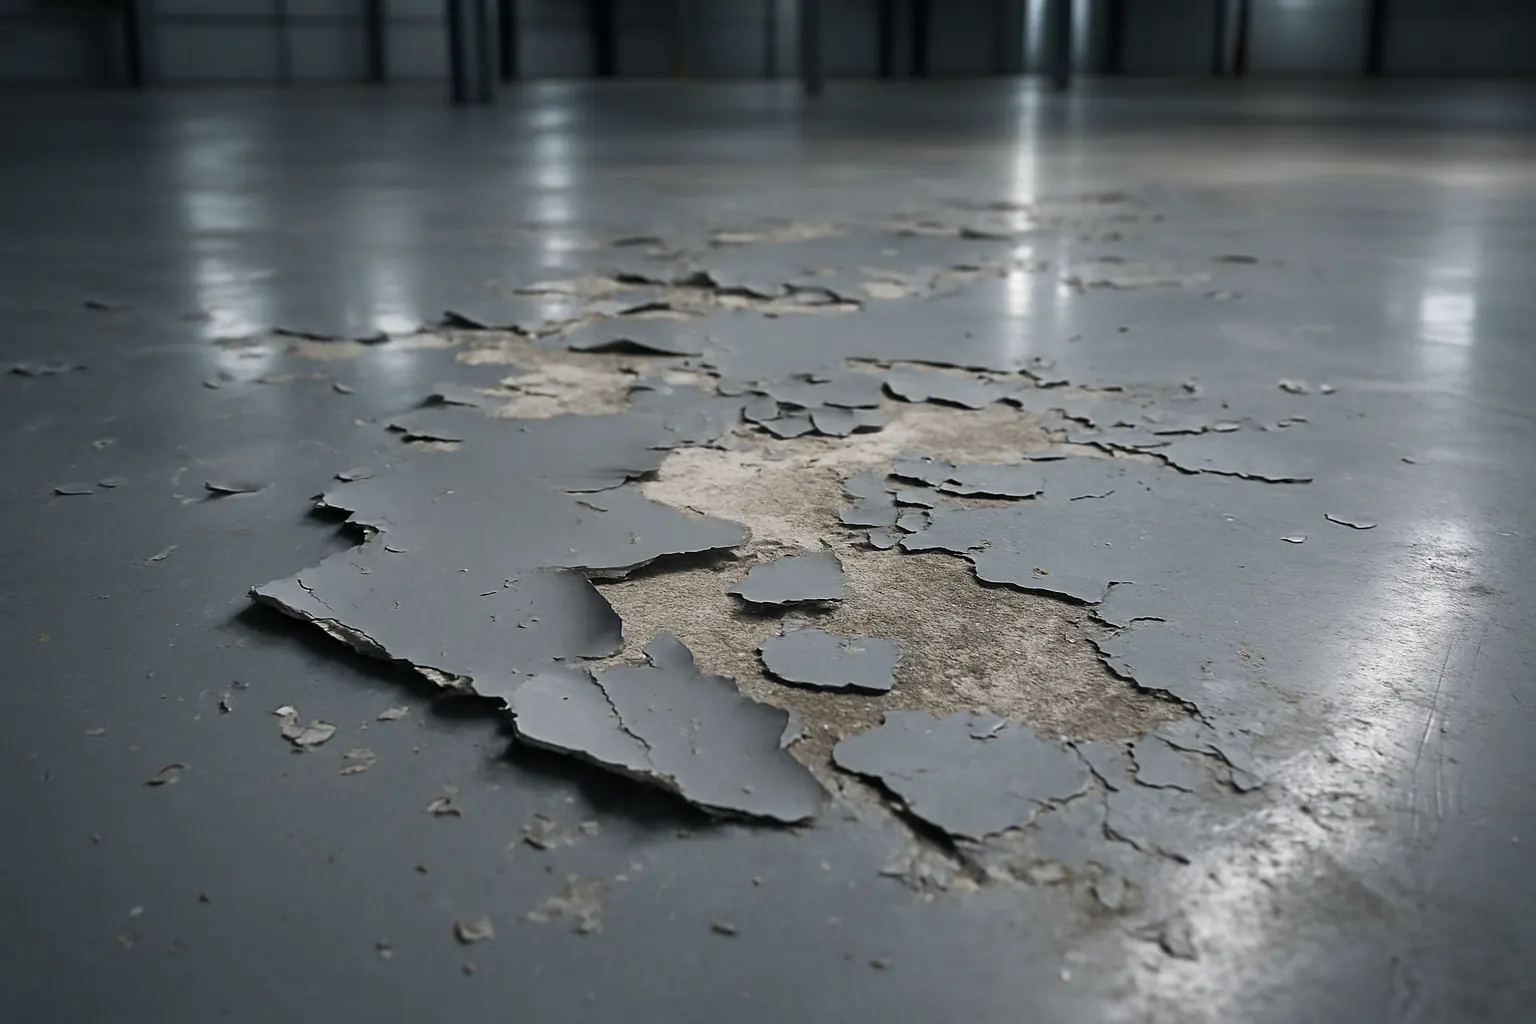
Epoxy does not fail on its own. When a resinous floor peels, bubbles, chalks, cracks along a joint, or lifts in sheets under a pallet jack, the coating is almost never the culprit. The concrete underneath it, the preparation that was skipped, or the installation decisions made in the field are what failed. The coating just made the failure visible.
That distinction matters because most facility managers respond to a failed floor by changing products. They assume the last contractor used cheap material and go shopping for something tougher. Then the new floor fails in the same place, on the same schedule, and the assumption gets more expensive. The variable that actually changed the outcome was never the resin.
Below are the nine causes we see over and over on commercial and industrial slabs across Chicagoland. Two of them — inadequate surface preparation and moisture in the substrate — account for the overwhelming majority of coating failures in the field. The other seven are real, but they are the exceptions. If you only fix prep and moisture, you eliminate most of your risk.
1. Inadequate Surface Profile
Epoxy bonds mechanically. It needs texture to grip — a measurable surface profile, described by the International Concrete Repair Institute as a Concrete Surface Profile (CSP) number from 1 (nearly smooth) to 9 (very rough). A thin-mil coating might be fine at CSP 2–3. A high-build or slurry system generally wants CSP 3–5. Mortar systems go higher.
Steel-troweled concrete straight out of the finishing crew’s hands is dense, closed, and glass-like. Coating it without opening the surface is like taping to a waxed hood. The material cures, looks flawless, and then releases in wide sheets the first time a forklift turns hard on it.
Profile also has to be uniform. A slab that got aggressive prep in the open bays and a quick scuff along the walls will fail along the walls. If you want the full breakdown of how each method builds profile, our comparison of diamond grinding, shot blasting, and acid etching covers where each one belongs and where it does not.
What proper prep looks like
- Mechanical preparation across 100% of the coated area — no shortcuts along perimeters, under racking, or behind equipment.
- Profile verified against ICRI replica coupons, not eyeballed.
- Cracks, spalls, and joints addressed after profiling, not before.
- Vacuum-assisted equipment so the dust does not settle back into the profile you just opened.
2. Moisture Vapor Emission Through the Slab
Concrete is a sponge with a schedule. Ground water and construction water move upward through the slab as vapor and try to escape at the surface. Put a low-permeance film over that surface and the vapor collects at the bond line, builds pressure, and pushes the coating off — often as blisters first, then as full delamination.
This is the failure mode that ruins otherwise perfect installations. The prep was right. The mixing was right. The floor looked exceptional for four months. Then a wet spring hit and the floor started lifting in circles. Slabs poured without an intact vapor retarder, slabs on grade with a high water table, and slabs in older Chicago-area industrial buildings are all common candidates.
You test for it. Calcium chloride testing (ASTM F1869) gives a moisture vapor emission rate in pounds per 1,000 square feet per 24 hours; relative humidity probes (ASTM F2170) read internal RH at 40% slab depth. Most conventional epoxy systems have manufacturer limits in the range of roughly 3 lbs MVER and 75–85% internal RH, though the actual number belongs to the specific system’s data sheet, not to a rule of thumb. Our guide to concrete moisture testing and MVER walks through when to test, how many tests a given square footage needs, and what to do when the numbers come back high.
The fix when readings are elevated is a moisture-mitigating primer or vapor-suppression membrane engineered for the measured level — not hoping, and not “letting it dry a few more weeks.” A slab on grade never stops emitting.
3. Contamination the Prep Never Removed
Oil, grease, hydraulic fluid, silicone, and coolant migrate into the pores of concrete over years of service. Degreasing the surface removes what you can see. Grinding removes what is in the top layer. Neither necessarily removes what has soaked an inch down into a decades-old maintenance bay.
Contamination shows up in the finished floor as fisheyes and craters — round voids where the resin pulled away from a low-surface-energy spot before it gelled. It also shows up as isolated patches of poor adhesion. If your floor is dotted with dimples, the diagnosis is in our article on bubbles, pinholes, and fisheyes in epoxy floors.
Heavily contaminated areas need to be identified before the bid, treated with hot-water pressure cleaning or a degreasing regimen, sometimes remediated by removing and replacing concrete, and always verified by a water-drop or tape adhesion check before any resin goes down. This is routine work in automotive service and manufacturing facilities and it should be scoped honestly rather than discovered on installation day.
4. Coating Over Curing Compounds, Sealers, or Old Coatings
New construction slabs are frequently sprayed with a membrane-forming curing compound. It is doing its job — holding water in the slab during cure — and it is also a bond breaker. So are silicate and silane sealers applied by a previous owner, and so is an old, chalking coating that has lost cohesion with itself.
Coating over any of these produces a floor that is only as strong as the layer beneath it. The new epoxy holds tight to the old sealer, and the old sealer lets go of the concrete. The result looks identical to an adhesion failure of the new product, and often gets blamed on it.
Every one of these has to be mechanically removed. Chemical stripping alone rarely gets it all, and it can drive residue deeper. This is one of the reasons our crews self-perform every step of a commercial epoxy floor installation rather than subcontracting prep to whoever is cheapest that week — the person doing the grinding is the person who has to warrant the bond.
5. Mixing, Ratio, and Induction Errors
Two-component epoxies cure by stoichiometry, not by drying. The resin and hardener have to be combined in the ratio the manufacturer specifies, mixed to full homogeneity including the sides and bottom of the pail, and — for many systems — given an induction period before application.
Off-ratio material does not cure into what it was supposed to be. Common symptoms include a floor that stays tacky for days, a surface that never reaches full hardness, amine blush (a greasy or waxy haze), soft spots that dent under load, and dramatically reduced chemical resistance. There is no repair for off-ratio epoxy. It comes out.
Partial mixing produces the same thing in patches — the well-mixed portion cures correctly and the streak of unmixed hardener along the pail wall does not. Boxing (combining and remixing batches) and disciplined pot-life tracking are the countermeasures, along with crews who work the same systems every week instead of learning a new data sheet on the job.
6. Installing Outside the Temperature and Dew Point Window
Chicagoland’s climate punishes sloppy scheduling. Epoxy cure rate is temperature-dependent; as a rough rule, reaction speed roughly halves for every 18°F drop. Cold slabs mean slow cure, extended tack, dirt pickup, and in some cases incomplete crosslinking that never recovers even after the building warms up.
The more common field error is dew point. If the slab temperature is at or within about 5°F of the dew point, moisture condenses on the concrete — invisibly — and the coating is applied to a wet surface. That produces blush, poor bond, and hazing. Slab temperature has to be measured, not assumed from air temperature, because a concrete floor lags ambient air by hours.
Heat is its own problem. A hot slab in a west-facing warehouse or distribution facility outgasses as it cools in the afternoon, pushing air up through the wet film and leaving pinholes. Scheduling application on a falling slab temperature, not a rising one, is basic craft.
7. Wrong System for the Actual Service Conditions
A floor can be perfectly installed and still be the wrong floor. Specification failures are quieter than adhesion failures — the coating does not peel, it just wears out years early, discolors, or cracks under conditions nobody accounted for.
| Condition | What it does to the wrong system | What it calls for |
|---|---|---|
| Steam cleaning, hot washdown | Thermal shock cracking and delamination | Urethane mortar or a system rated for the temperature swing |
| Forklift and hot-tire traffic | Hot-tire pickup, lifted patches at turning points | High-build, 100% solids epoxy at adequate film thickness |
| Direct sunlight, skylights, overhead doors | Ambering and chalking of the topcoat | UV-stable aliphatic topcoat |
| Acids, solvents, caustics | Softening, blistering, staining | System selected against a real chemical exposure list |
| Standing water, sanitation drains | Edge undercutting and failure at terminations | Integral coving, slope to drain, keyed terminations |
Thermal shock is the one most facilities underestimate. A food and beverage plant that hoses a 160°F sanitation cycle onto a 55°F slab is applying a violent expansion differential between coating and concrete. Thin epoxy will not survive that indefinitely regardless of who installed it. Systems like National PolyGuard 200 exist for those conditions, and the National Armour 100 family covers the high-build traffic-bearing side.
8. Film Thickness and Recoat Window Mistakes
Mil thickness is not a preference. A system engineered at 20 mils delivers its published abrasion and impact performance at 20 mils. Spread thin to stretch material across an extra bay and you get a floor that telegraphs every substrate imperfection, wears through at traffic lanes, and offers a fraction of the chemical resistance it was sold on.
Recoat windows work the other way. Most epoxies have a maximum recoat time — a window during which the previous coat is still chemically receptive. Miss it and the next coat bonds mechanically at best, or delaminates between layers, which is the classic “the top layer peeled but the base coat is still stuck tight” complaint covered in our article on epoxy floor peeling and delamination.
Blowing the recoat window is recoverable, but only by abrading the entire cured surface before the next coat. That costs a day nobody budgeted, which is exactly why it gets skipped.
9. Detailing Failures at Edges, Joints, and Drains
Floors rarely start failing in the middle. They start at the perimeter, at a control joint, at a drain, at a doorway threshold — anywhere the film terminates and water or mechanical force can get a fingernail under the edge.
- Terminations: A coating that simply stops at a wall or slab edge invites undercutting. Terminations should be keyed into a saw-cut or run into integral cove base.
- Control and construction joints: Concrete moves. Coating rigidly over a moving joint transfers that movement into the film and cracks it. Joints get honored, filled with the appropriate semi-rigid filler, and in many cases re-established through the coating.
- Drains and trenches: In sanitary environments, coating has to be carried into the drain and terminated inside the throat. Stopping short creates a permanent water path under the floor.
- Coving: Integral cove base eliminates the wall-floor seam entirely, which is why it is standard in pharmaceutical and food-processing environments where washdown is daily.
Diagnosing a Failure Before You Re-Coat
Before rebidding a failed floor, get the diagnosis. Guessing costs more than testing. A competent evaluation includes core sampling or at minimum a chipped-out section to see what layer separated, adhesion pull testing to quantify bond strength, moisture testing to a recognized standard, and a chemical and thermal exposure review against how the space is actually used today rather than how it was used when the original spec was written.
The answer to “which layer let go” tells you almost everything. Coating with concrete stuck to its underside means the concrete failed cohesively and the bond was fine. A clean release with a polished concrete face means prep failed. A release with moisture, blisters, or a whitish film at the bond line points at vapor drive or condensation. More diagnostic detail lives in our epoxy flooring knowledge base.
Frequently Asked Questions
How long should a commercial epoxy floor last?
Service life depends far more on the system, the film thickness, and the traffic than on the brand. A properly prepared and correctly specified high-build industrial system in a moderate-traffic environment commonly performs for many years before it needs a refresh topcoat, while a thin-mil coating in a heavy forklift lane may show wear within a couple of years. What we can say without qualification is that a floor installed over a slab with unresolved moisture or inadequate profile will fail early no matter what was applied.
Can you install epoxy over a floor that already failed?
Sometimes, but not by coating over the failure. Any loose, delaminating, or contaminated material has to come off mechanically, and the underlying cause has to be corrected — otherwise the new system inherits the old problem. If the failure was moisture-driven, that means adding mitigation. If it was profile-driven, it means full re-prep.
Is moisture testing really necessary on an older slab?
Yes, and older slabs are often worse than new ones. Age lets concrete dry out construction water, but it does nothing about ground water pushing up through a slab poured without an effective vapor retarder — which describes a lot of mid-century industrial buildings around Chicago. The only way to know your number is to test it.
Why does my floor keep failing in the same spot?
Repeat failures in a consistent location almost always mean a localized substrate condition: a low spot where water stands, a slab section over a plumbing penetration, a former equipment pad with soaked-in oil, or a joint that is moving. Fixing the coating in that spot without addressing the condition just resets the clock.
Does the coating manufacturer or the installer own a failure?
In our experience the vast majority of failures trace to installation and site conditions rather than material defects, which is why we self-perform every step. The systems we install are manufactured by NexGen Polymers in the USA, and our crews handle the prep, the moisture assessment, the application, and the detailing — so there is no gap between who tested the slab and who warrants the bond.
Do you work outside Chicago proper?
We install throughout Chicagoland and into parts of Northwest Indiana and Southeast Wisconsin, roughly a 50-mile radius from our Carol Stream headquarters. That covers everything from Naperville and Elk Grove Village to Gary and Kenosha; the full list is on our service area page.
Get an Honest Assessment of Your Slab
If you are looking at a floor that is peeling, blistering, or wearing through years earlier than it should, the useful next step is a diagnosis rather than a new quote for the same scope. National Epoxy has been installing commercial and industrial epoxy flooring for over 30 years, and we would rather tell you your slab needs mitigation before we coat it than come back to argue about it afterward.
Reach out through our contact page or call (630) 919-5000 to schedule a site evaluation.