
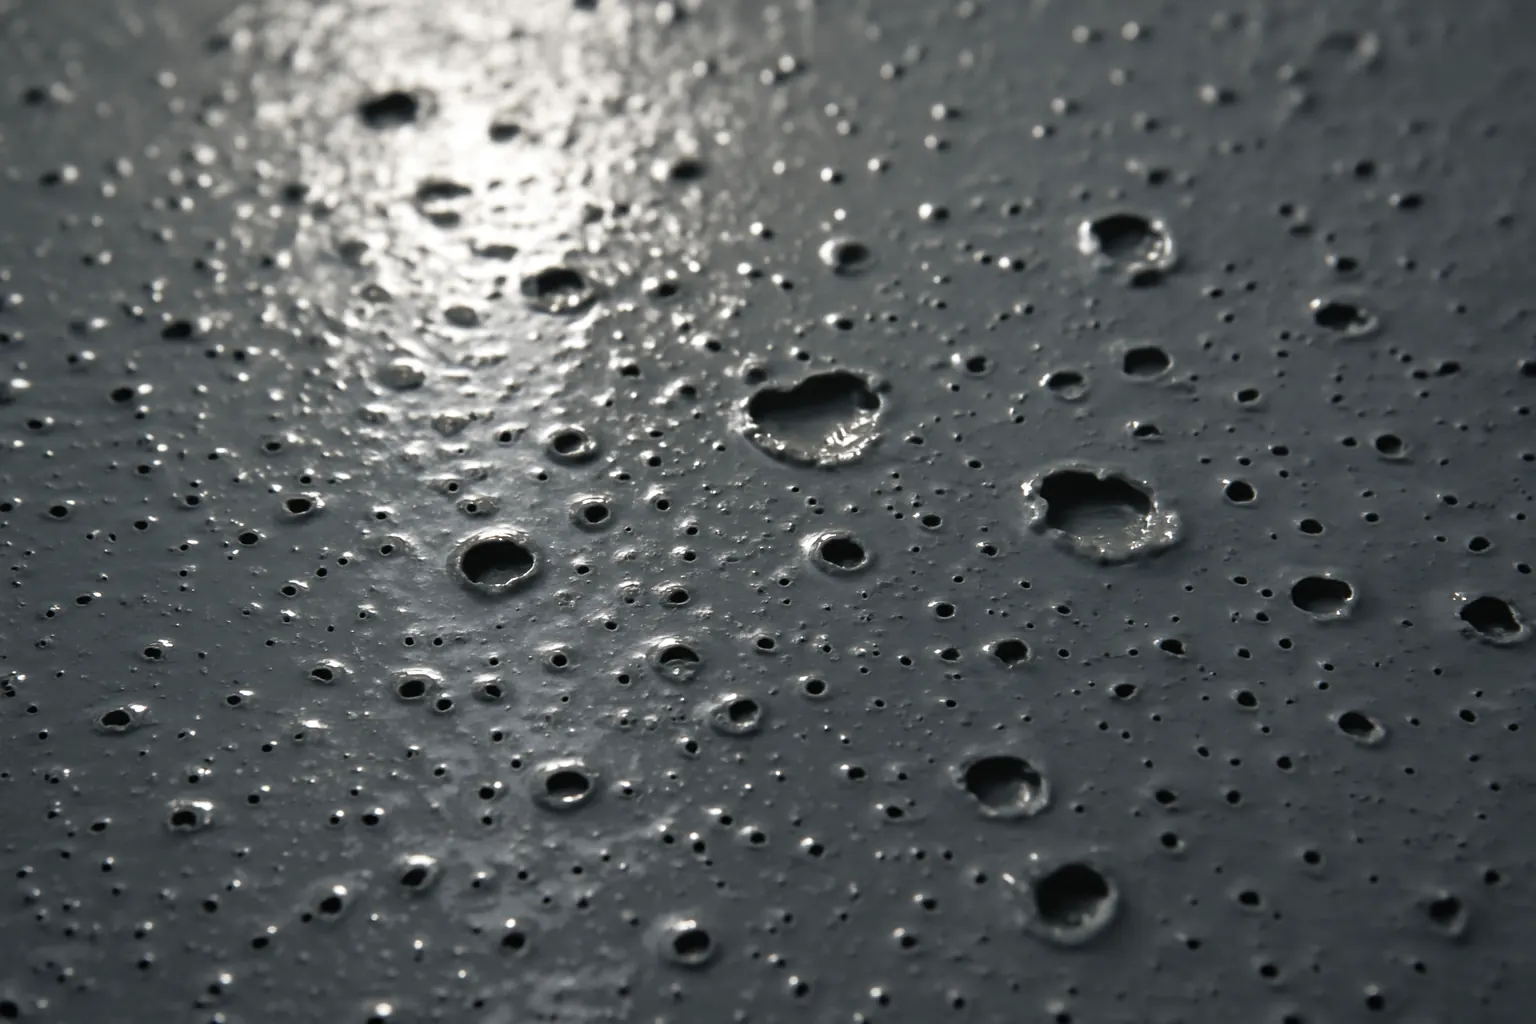
A freshly installed epoxy floor should look like poured glass. When it instead cures with a field of tiny craters, a rash of pinholes, or scattered domes that pop under a boot heel, something specific went wrong — and each defect points at a different cause.
These are not cosmetic complaints. Pinholes and craters are voids in the film. In a sanitary environment they harbor bacteria and defeat the whole reason the floor was specified. In a chemical exposure area they are direct paths to the substrate. And in every environment they represent film thickness you paid for and did not get.
The good news is that this family of defects is highly diagnosable. Bubbles, pinholes, fisheyes, craters, and blisters each have a distinct signature, and the difference between them tells you whether the problem was the slab, the air, the mixing, or something on the floor that should not have been there.
Know Which Defect You Actually Have
| Defect | What it looks like | Primary mechanism |
|---|---|---|
| Outgassing pinholes | Small holes, often clustered, sometimes with a tiny raised rim | Air pushed up out of the concrete through the wet film |
| Entrained air bubbles | Uniform fine bubbles across the whole batch area | Air whipped in during mixing, never released before gel |
| Fisheyes / craters | Round, dish-shaped voids where the coating pulled away from a point | Surface-tension defect from a contaminant |
| Solvent popping | Fine broken bubbles in the surface skin | Volatiles escaping after the surface skinned over |
| Osmotic blisters | Larger domes, often with liquid inside, appearing days to months later | Moisture vapor pressure under the film |
| Amine blush haze | Greasy, waxy, or cloudy surface film, not a void | Amine hardener reacting with humidity and CO2 |
Timing separates two of these immediately. Defects present when the coating gels are application problems. Domes that appear weeks or months after a clean install are almost always moisture, and belong in the diagnostic path described in epoxy floor peeling and delamination.
Outgassing: The Number One Cause of Pinholes
Concrete is porous. Those pores are full of air, and air expands when the slab warms. When a slab is warming during or shortly after application — afternoon sun through skylights, morning heat coming on, a warehouse door opened onto a hot day — that expanding air pushes upward, right through the wet resin, and leaves a hole behind.
The fix is scheduling, not product. Apply on a falling or stable slab temperature. In practice that means afternoon and evening application in a space that is warming through the day, and it means measuring the slab with an infrared thermometer rather than reading the wall thermostat. Concrete lags ambient air by hours; a slab can still be climbing at 2 p.m. in a building that felt warm at 8 a.m.
Other outgassing contributors
- Barometric pressure drops. A falling barometer ahead of a storm reduces pressure above the slab and encourages air out of the pores. It is a real effect and worth watching in Chicagoland’s swing seasons.
- Very porous or open concrete. Slabs prepared with aggressive shot blasting, or older slabs with large voids, hold more air to release.
- Skipping the primer. A properly applied penetrating primer fills and seals the pore structure. Going straight to a high-build coat over open concrete is asking for pinholes.
- Bugholes and honeycomb in the slab that were never filled. These are reservoirs.
The countermeasures are a real primer coat applied thin enough to penetrate rather than bridge, a scratch coat or skim to fill open porosity where needed, spike-roller backrolling to let trapped air escape while the film is still open, and application timed to slab temperature. Prep method changes how much of this you face — see our comparison of diamond grinding versus shot blasting versus acid etching.
Entrained Air From Mixing
If the bubbles are fine, uniform, and confined to the area covered by one or two batches, the air came from the pail, not the slab.
Mixing epoxy is a specific operation. Too fast, and the blade whips air into a viscous resin that will not release it before gel. Lifting the mixing blade above the surface does the same thing. Mixing in an undersized pail forces a vortex. And a resin that is cold is dramatically more viscous, holds air far better, and releases it far worse — a cold pail on a cold morning is the classic setup.
The disciplines that prevent it:
- Condition material to the manufacturer’s recommended temperature before mixing — typically room temperature, never straight off a cold truck.
- Use a low-speed drill and a jiffy-style blade sized for the container, blade fully submerged.
- Mix for the full specified time, scraping sides and bottom, then box and remix.
- Observe any induction period the system requires.
- Pour promptly and backroll with a spiked roller to release entrained air while the film is still open.
Cutting mixing time to beat pot life is a false economy — it trades bubbles for the far worse problem of under-mixed, off-ratio material that never fully cures.
Fisheyes and Craters: A Contamination Problem
Fisheyes look different from pinholes and mean something different. A pinhole is a puncture from below. A fisheye is a dish — the wet resin flowed away from a point on the surface because that point had lower surface energy than the coating could wet out.
The usual causes:
- Silicone. The worst offender by a wide margin. It comes from mold releases, aerosol lubricants, some caulks and sealants, tire dressings, and cleaning products. Microscopic quantities cause visible craters.
- Oil, grease, and hydraulic fluid soaked into the pore structure — routine in automotive service and manufacturing floors and often deeper than grinding reaches.
- Residual detergents or degreasers that were not fully rinsed after cleaning.
- Airborne overspray from adjacent work — lubricants, paint, WD-type products drifting onto a prepared slab.
- Contaminated rollers, squeegees, or spike shoes that carried silicone in from another job.
Detection before you coat is simple: drop water on the prepared slab. If it beads instead of darkening the concrete and soaking in within seconds, something is repelling it, and it will repel resin too. Run that check across the floor, not in one convenient spot.
Remediation depends on depth. Surface contamination responds to hot-water pressure washing and appropriate degreasing followed by re-profiling. Deeply penetrated oil may require repeated cycles, poulticing, or in bad cases removal and replacement of the affected concrete. Coating over it and hoping is the option that produces the crater field.
Solvent Popping and Overthick Application
Solvent popping shows up as a fine field of broken bubbles in the surface skin. It happens when the top of the film skins over before volatiles below have escaped — the trapped material forces its way out through a partially cured surface.
The causes are film thickness beyond what the system allows, application in conditions too hot for the cure rate, or too little flash time between coats. This is one reason 100% solids systems dominate industrial work: with essentially no solvent to escape, the popping mechanism largely disappears. It is also why applying a coat thicker than the data sheet permits is a mistake even when it seems efficient.
Related failure: overthick application in a single pass can also generate excess exotherm in fast systems, accelerating gel and locking in whatever air has not escaped.
Osmotic Blisters: A Moisture Problem in Disguise
If the floor cured clean and then developed domes weeks or months later, you do not have an application defect. You have vapor drive.
Water moving up through a slab on grade reaches the underside of a low-permeance film, accumulates, dissolves alkaline salts, and generates osmotic pressure that lifts the coating into blisters. Puncture one and you often find liquid — sometimes slick or soapy from alkalinity. Blistering that comes and goes with the seasons or worsens after heavy rain is a textbook signature.
This is preventable and measurable before installation. Calcium chloride testing per ASTM F1869 gives a moisture vapor emission rate; in-situ relative humidity probes per ASTM F2170 read internal slab RH. Our guide to concrete moisture testing and MVER covers test counts, conditioning requirements, and the mitigation options when numbers come back high.
Amine Blush: Not a Void, Still a Failure
Amine blush is the greasy, waxy, or hazy film that forms when the amine hardener in an epoxy reacts with atmospheric moisture and carbon dioxide instead of with the resin. It shows up most in cool, humid conditions — the exact conditions of an unconditioned Chicago-area building in spring or fall.
Two consequences. First, the surface looks cloudy or oily and will not gloss out. Second, and worse, it is a bond breaker: apply the next coat over blush and you get intercoat delamination weeks or months later.
The remedy is to wash the blush off with warm water and a suitable detergent, rinse thoroughly, dry, and then abrade before recoating. Prevention is environmental control during cure — keeping the space above the dew point margin and within the system’s temperature window.
A Practical Prevention Checklist
Nearly every defect in this article is prevented by the same set of field disciplines. Before any resin goes down:
- Measure slab temperature and dew point, not just air temperature. Keep the slab at least about 5°F above dew point, and schedule application on a falling or stable slab temperature.
- Confirm moisture testing is complete and mitigation is installed where indicated.
- Water-drop test the prepared surface in multiple locations to catch contamination.
- Vacuum thoroughly — dust in the profile is a bond breaker and a bubble source.
- Prime properly, thin enough to penetrate and seal porosity rather than bridge it.
- Fill bugholes, spalls, and open joints before the body coat.
- Condition material to temperature before mixing.
- Mix at low speed, full time, blade submerged, then box and remix.
- Respect film thickness and the recoat window on the data sheet.
- Backroll with a spiked roller and control foot traffic and airflow during cure.
None of this is exotic. It is the ordinary discipline of crews that self-perform every step of a commercial epoxy installation rather than handing a slab between three subcontractors who each assume someone else checked.
Can Pinholes and Craters Be Repaired?
Sometimes, and the answer depends on when you catch them and how deep they go.
Caught while the coat is still within its recoat window, a light skim or an additional coat can fill and close a modest pinhole field. Caught after full cure, the surface has to be abraded before anything new will bond, and severe cases may need a filling coat followed by a full topcoat to restore appearance and thickness.
Fisheyes are less forgiving. Because the cause is a contaminant sitting on or in the substrate, recoating over a crater usually reproduces the crater in the new layer. The contamination has to be removed first, which typically means grinding out the affected area.
Osmotic blisters cannot be repaired by coating. The pressure source is under the film and will simply lift the repair. Mitigation has to be added, which means removal and reinstallation of the affected area at minimum.
In sanitary environments the calculus is stricter. A pinholed floor in a food and beverage plant or a pharmaceutical facility is a cleanability failure, not a cosmetic one, and the acceptance standard should reflect that. The same is true in healthcare environments where surface integrity is part of infection control.
Frequently Asked Questions
Are a few pinholes acceptable in an industrial floor?
It depends on the environment and what the specification says. In a dry warehouse aisle, isolated pinholes are largely cosmetic. In a washdown, sanitary, or chemical-exposure area they are defects that compromise the floor’s function, because they are direct paths through the film. Set the acceptance criteria in the spec before installation rather than debating it after.
Why did only one section of my floor bubble?
Localized defects point at a localized condition. Common explanations are a slab section that was warming while the rest was stable, a batch that was mixed too fast or applied cold, an area with much higher porosity, or a zone of contamination. Mapping the affected area on a floor plan usually makes the pattern obvious.
Does a primer coat really prevent pinholes?
It is the single most effective control for outgassing pinholes. A penetrating primer fills and seals the concrete’s pore structure so there is far less air available to push through the body coat. It has to be applied at a rate that lets it soak in rather than sit on top, and porous slabs sometimes need more than one pass.
Can bubbles appear after the floor is in service?
Application-related bubbles appear during cure, not later. Domes that show up weeks or months into service are moisture-driven blisters, and they call for slab testing rather than a cosmetic repair.
Is the coating manufacturer responsible for pinholes?
In the field, these defects overwhelmingly trace to substrate condition, environmental conditions during application, and mixing or application technique rather than material defects. That is why we handle prep, testing, and application with our own crews using systems manufactured in the USA by NexGen Polymers — the conditions that cause these defects are the ones the installer controls.
What system avoids these problems in a demanding facility?
System selection is driven by service conditions, not by defect avoidance — but 100% solids systems eliminate solvent popping, and adequate build helps bridge minor substrate porosity. High-build options such as National Armour 100 and chemical-duty systems like National PolyGuard 200 serve different conditions. More technical background is collected in our knowledge base, and the broader failure picture is in why epoxy floors fail.
Get a Floor That Cures Clean
Bubbles, pinholes, and fisheyes are field-control problems, and field control is what separates a floor that performs from one that has to be redone. National Epoxy has installed commercial and industrial epoxy flooring for over 30 years across Chicagoland, from Elk Grove Village to Bolingbrook and beyond — the full list is on our service area page.
If you have a defective floor or a project you want done right the first time, use our contact page or call (630) 919-5000.